Monday, 2 November 2015

Remembrance Poppy Crochet

It's Remembrance Day on 11th November and the red poppy has become an emblem of Remembrance.
I crocheted my own this year using this pattern
I used Patons Fairytale Soft 4ply yarn in a bright red and a 3.5mm hook. 

A black silk button gave my poppy a centre with a badge pin sewn on behind it.
Despite wearing my own poppy, when I see the Royal British Legion selling theirs, I'll still put my money in the tin.

Friday, 30 October 2015

Merry Christmas Mitts

I love a free pattern, so when it came from one of my favourite creators, I was over the moon!  It went straight to the top of my 'To Make' list.
The Merry Christmas Mitts pattern by HanJan Crochet (Hannah Cross) is well written and can be completed very quickly.
The pattern uses one colour yarn, but I used two; Patons Smoothie DK in Blue and Lilac Mix. I think they compliment each other well.

I used a 4mm hook, as recommended on the yarn label.
As Hannah says, these are just the thing for last minute stocking fillers... though I think they're also just the thing for me!
Check out some more fingerless glove inspiration over at my Project Gallery.

Monday, 19 October 2015

Au Revoir! Handmade Card

Do you use Instagram? I've grown quite attached to it of late and from time to time I post about the projects I'm working on.

This is my most recent project post...
A simple leaving card for my work colleague. She loves Paris, so Au Revoir seemed fitting.
Red, white and blue (the colours of the French flag). An Eiffel Tower charm attached to a ribbon bow. The sentiment "Au Revoir" not "Goodbye".
I just love simple cards. Less is more, plus they're quick to make.

If you're on Instagram, why not follow me? 


Thursday, 8 October 2015

The Knitter's Handbook

I try my hand at many crafts, but I haven't knitted since I was a kid. A couple of years ago I tried with my Mom's help, but failed instantly. I can crochet so, why can't I knit?

When I got my hands on The Knitter's Handbook by Eleanor van Zandt, I couldn't wait to delve in and finally learn this craft.
The book covers everything from the basics for a new knitter (like me!) to special techniques for the more experienced.
I started with the basics and found it very easy to follow - the casting on illustrations are clear and simple.
Before long I was knitting my first few rows. It took a while to get to grips with it. They weren't perfect, but isn't that what practice makes?
Textures are clearly photographed and explained. Techniques likewise. I aspire to do these one day!
This book reminds me of the pocket Crochet Answers Book - everything is explained clearly. I love my crochet book and refer to it often. I can see this book getting the same attention.

The Knitter's Handbook also shows you how to do those finishing touches, like crochet edging, pompom making and embroidery on knitting.
In conclusion, this book is ideal for all levels of knitters and is the perfect book to keep-to-hand in your knitting bag. I know my copy will be.


Hamlyn

Monday, 5 October 2015

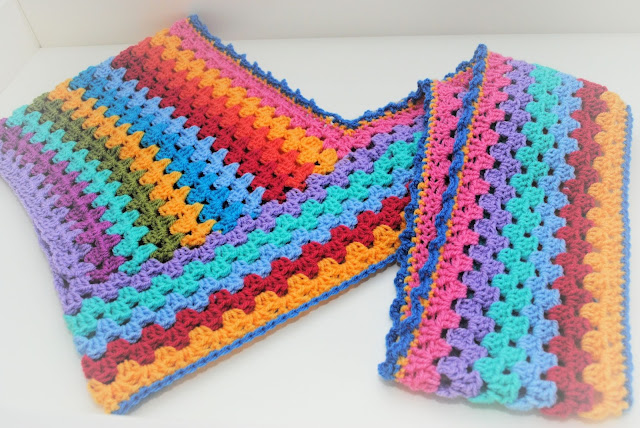
Harlequin Hoodie

Here's my latest crochet make, The Harlequin Hoodie...
I found the free pattern by Marken of The Hat & I on Ravelry.
It's a great project to pick up here and there, when time allows.
I used Stylecraft DK yarn in bright colours and a 6mm hook.

Saturday, 26 September 2015

Afternoon Cowl

This week we've all been suffering with colds. So on Thursday afternoon, whilst snuggled up with my boy, I crocheted this cowl...
I used the same stitch pattern as with my Buggy Blanket
Here's how I made it...
Chunky Wool (I used less than 2 balls)
8mm hook
Ch 75
SC (UK DC) into second chain from hook
*DC (UK TR) into next chain, SC (UK DC) into next chain*
Repeat * to the end of row.
Turn and Ch1
Continue doing the same for each row until you have the cowl width you desire.
Fasten off and weave in ends.
Attached a toggle or large button so it can be fastened together.
Easily worn in many ways
I'd love to know if you go on to make this cowl yourself.

Pattern © Leasowes View 2015

Sunday, 13 September 2015

SNUG AS A BUG IN A RUG

Here's my very first crochet rug...
My good friend Cayte at Pisky Cove Porthleven encouraged me to have a go at making one - she makes and sells them in her shop.

So I purchased a few rolls of Boodles fabric yarn and set about making my rug.
I started off by chaining 4 and joining to make a loop.

I chained 2 then did 10DC (UK TR) into the loop, finally slip stitching into the first DC (UK TR) (ignoring the Ch2 each round - I found this made the seam less obvious).

I continued working in rounds increasing by 10 each round, using various hooks depending on the type of fabric yarn used.

Again due to the different types of fabric yarn, I found that sometimes my work would curl up (if I didn't increase enough) and other times it would wave (if I increased too much). So I would undo that particular round and adjust. 
I didn't bother weaving in the ends of my yarn - Cayte said it's supposed to be organic and handmade!
As my rug grew bigger, I did certain rows in SC (UK DC) as I was running out of some colours!
I finished the rug with an invisible fasten off ... there's a great tutorial here
I love my first crochet rug.

I love how I have finally learnt to not need a pattern.

I love how I have learnt that there's no such thing as the Crochet Police!

Linking up at these sites

Friday, 11 September 2015

NEW NAME, NEW URL

After over three years as QUINTONWENCH, I'm renaming my site.

I have moved on and grown so much since starting out and like many other bloggers, I've decided my work needs a new name.

So introducing...

Well our home overlooks The Leasowes here in the West Midlands of the UK. Whenever I'm blogging or creating I am always looking out to the meadow and woodlands. So Leasowes View describes perfectly where I'm at right now.

I hope you'll continue with me on this journey and I look forward to welcoming you to my new site.

You can also follow me on Facebook, Twitter, Instagram, Google +, Pinterest, Bloglovin.

Saturday, 15 August 2015

You've Been Framed

Last month our little boy had his first professional photo session and it was with the lovely Natasha at New Era Photography.

I absolutely adore every photo she took and I wanted to display them as quickly as I could.

This Hanging Polaroid Photo Frame project made it possible...
© quintonwench.com
I bought a £3 framed image from my local Country Baskets store, simply because I love the frame.
© quintonwench.com
Using PicMonkey, I made each of my 12 images into a polaroid (see the 'Frames' section)
© quintonwench.com
I printed all polaroid images on to photo paper as 'Wallet Size'
© quintonwench.com
Using a knife and craft mat, I cut out each polaroid image
© quintonwench.com
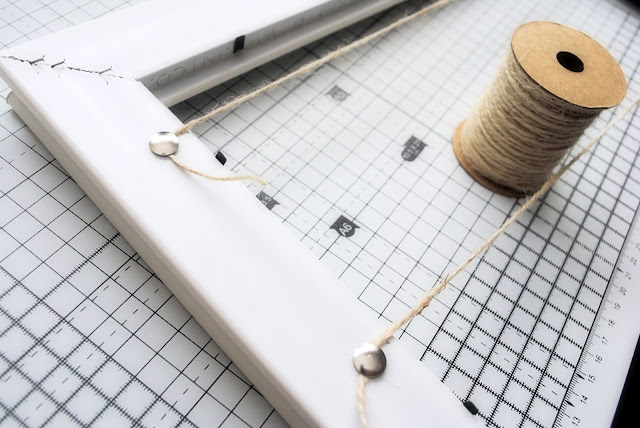
I removed the existing image from my frame and using drawing pins, I attached 3 pieces of twine to the frame
© quintonwench.com
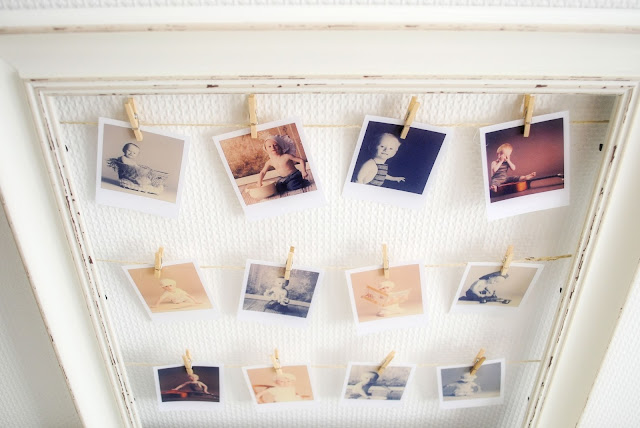
Finally, using small pegs/clothespins, I evenly attached each image to the twine
© quintonwench.com
A perfect way to display many images in one space
© quintonwench.com

**** Linking up at these sites